It’s been a big month in our household, as Rob and I have just become first-time uncle and auntie to our gorgeous new nephew, Rami. I finally got to meet him over Easter, aged just three weeks old – and it’s safe to say we’re all completely in love!

Before Rami was born, we were both excitedly preparing for his arrival. Rob went out and bought the tiniest England rugby strip that he could find, and I was busy setting up a new ‘Baby Crafts’ board on Pinterest. Daily commute well spent! I still have lots of ideas on my list to try (just watch this space), but I’ll start by sharing one of my favourite new makes – a personalised button art frame.
Now, I know that I say this a lot, but this one is pretty easy – and the end result is lovely. Any other babies wanting these, send them my way…or my adult friends might start getting button gifts instead!
So, it’s button time…let’s get crafting!
What you need:
- A box frame – mine was the 18x18cm white shadow box frame from Hobbycraft
- Some nice paper/card for backing – I found some handmade Indian paper in my parents’ garage (the benefit of having a family business dealing in art supplies!)
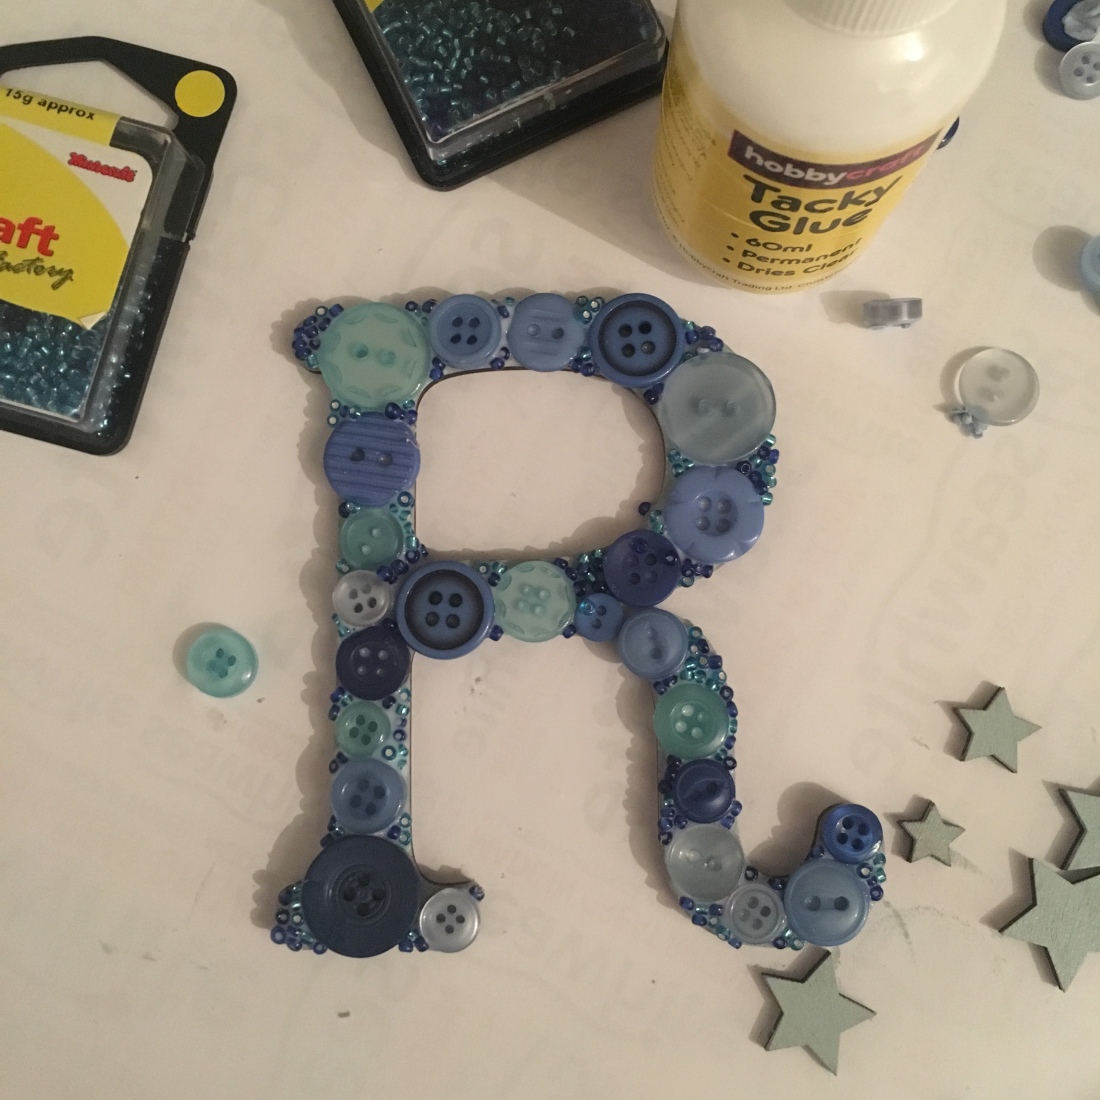
- An assortment of buttons in your chosen colour scheme – I found these buttons at Hobbycraft for only a pound, and they worked perfectly!
- Small beads to fill in the gaps – mine were Hobbycraft seed beads
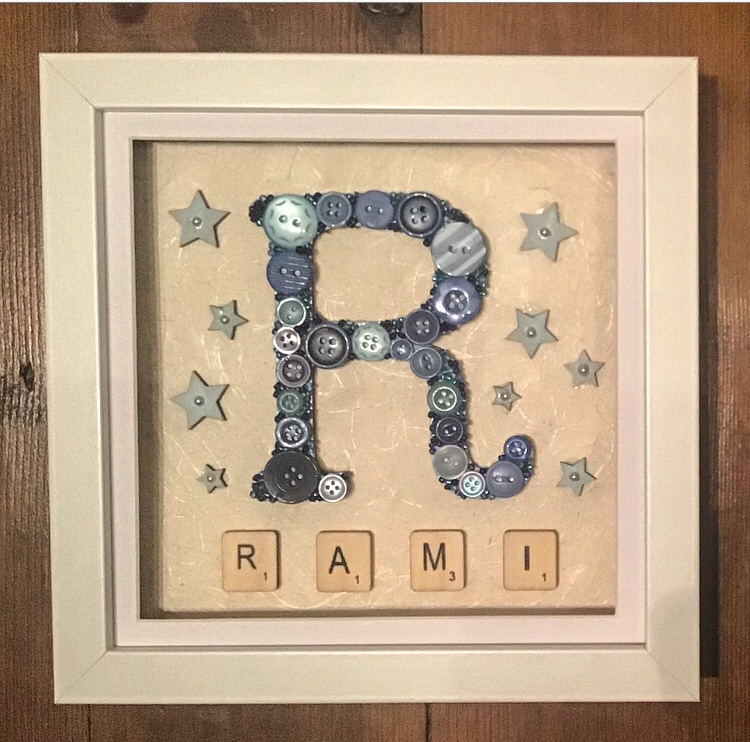
- A cut-out shape for your main monogram letter, that’s about half the size of your frame. I used the Alphabet Bunting Letters from Artcuts, which is my new favourite craft crush – once you visit their site, please don’t hold me accountable for how much you buy!
- Small letters for the name – I used Hobbycraft wooden letter tiles
- Tacky glue for sticking the buttons on
- Decorative bits and pieces to fill space around the letter – I went for some wooden stars and silver pearl craft stickers from Artcuts
- An ink pad or paint for your main letter and any other wooden decorations that you’re sticking on – I used an Artcuts ink pad which I already had from another secret project that I’ve been working on. This should match your main colour scheme, in case you have any gaps between your buttons and beads.
How it’s done:
- Cut your backing paper/card to fit your frame
- Using your ink pad, colour your main monogram cut-out shape and let dry. I also coloured the wooden star decorations that I had at the same time
- Once your letter shape is dry, use your tacky glue to stick buttons onto it. Try not to go too much over the edges (a little bit is fine) to keep the definition of the letter, and mix up sizes and colours. Don’t worry if there are gaps between the buttons – this is what beads are for!
- Let your buttons dry onto the shape, and then cover the gaps with tacky glue. Take your beads, and use these to cover the gap/
- If you’re using painted stars like I did, then stick your silver pearl craft gems into the middle of them to add a bit of sparkle!
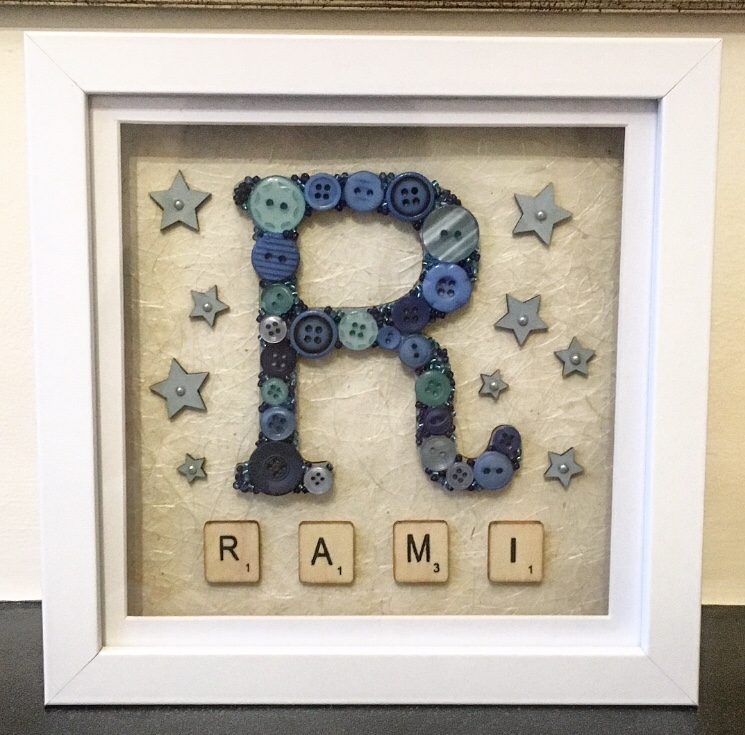
- Once everything has dried, position your main letter onto your card backdrop, along with the letter tiles to spell the full name, and the decorative stars. When you’re happy with the position, take your tacky glue and stick it all down
- And finally, place everything into your frame!
Now that I’ve gotten started on button crafts, I can’t wait to try my next frame. As always, if you give this craft a go, please send me your pictures – I’d love to see them!