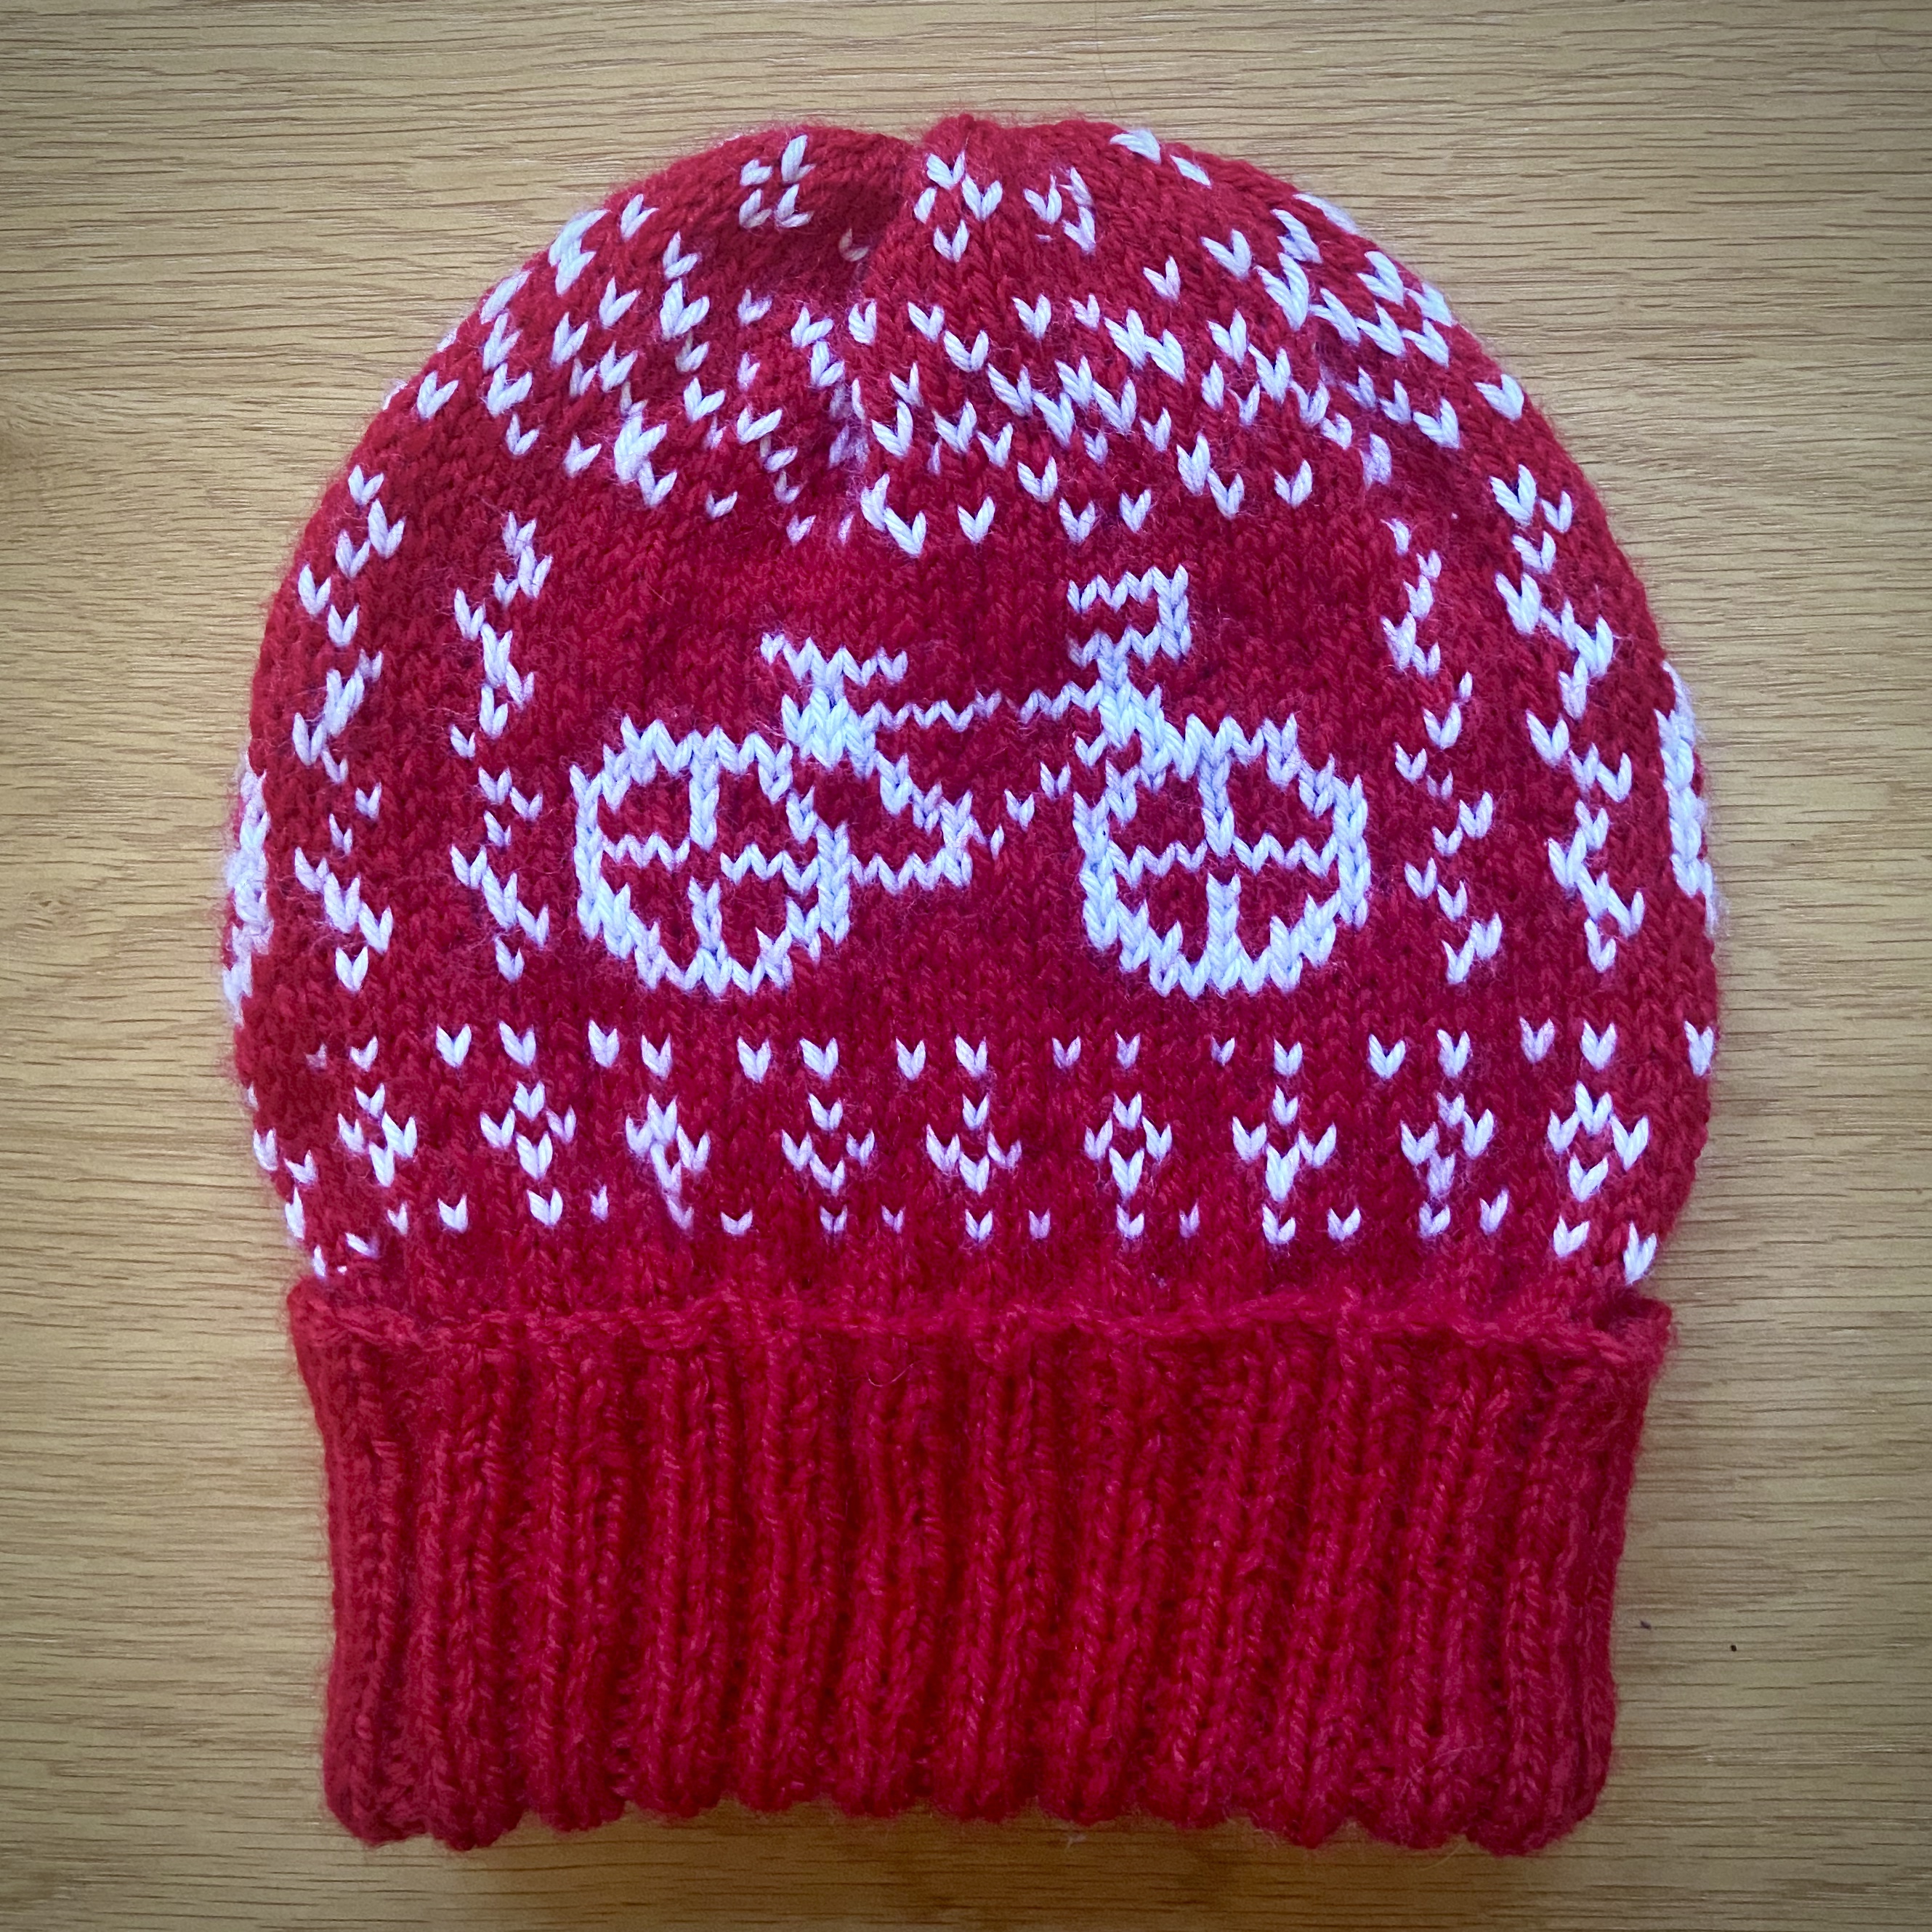
Fair isle looks tricky, but two-colour patterns are a great way to get yourself going. In reality, if you can knit a basic bobble hat, this isn’t actually much of a step up – but it certainly looks like one. And it’s incredibly satisfying seeing the pattern emerge as you complete each new round!
Despite this being my first fair isle design, I’m not actually much of a cyclist myself (no comments please from people who have seen me attempt a bike ride in recent years!) – but lots of my family and friends are much more proficient, so it’s proving a popular pattern for the winter season.
Note – this hat is designed to fit the average female head – if you’re looking to knit a man-sized number, I’d recommend sizing up to 5mm needles and an appropriate yarn to go with this. Both my husband and I managed to wear the original size, but we come from a household of relatively small heads!
What you’ll need:
- 4mm circular knitting needles (or 5mm for the bigger heads amongst us!)
- DK yarn for Colour A (c.185m)
- DK yarn for Colour B (c.75m)
- Yarn needle
Things to know:
- Gauge: 4cm = 11 stitches and 11 rows in main pattern (knit stitch) on 4mm needles
How it’s done:
Knitting the brim:
- Cast on 104 stitches in Colour A
- (K2, P2) in the round until work measures approx. 13cm
Main pattern:
- Knit one round, increasing by one stitch so that you have 105 stitches.
- Join your second colour (Colour B) for the next round
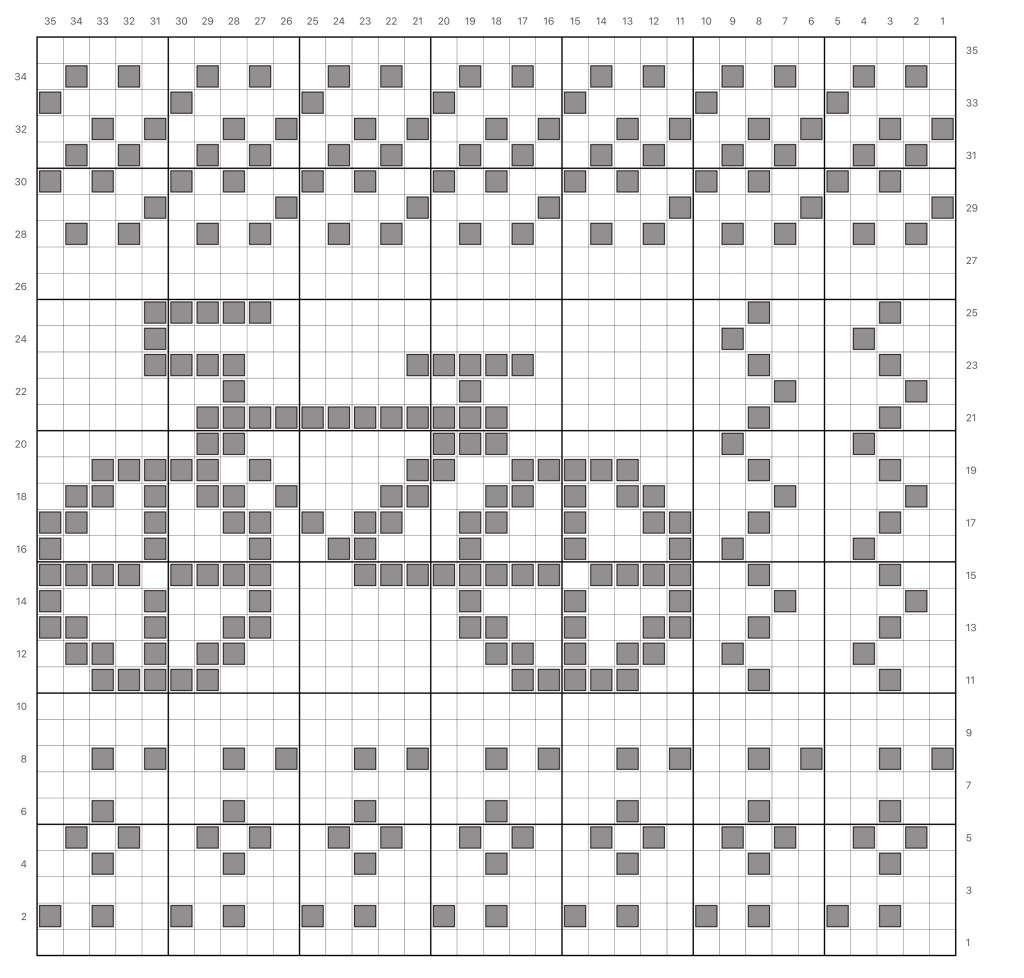
- Follow the pattern below, using Colour A for the background and Colour B for the detail, repeating it 3 times for each round (3 sets of a 35 stitch pattern)

Decrease for crown:
- Tie off Colour B
- Continuing in Colour A, knit 3 more rounds. At this point, your hat should measure c. 20cm with the brim folded over [Note – if you’d like to add extra length to your hat, you can add additional rounds of knit stitch in Colour A here]
- First round of decreases: (K1, K2tog) to end – 70 stitches remaining
- Knit one round
- Second round of decreases: K2tog to end – 35 stitches remaining
- Knit one round
- Third round of decreases: K2tog until 1 stitch before the end, then K1 – 18 stitches remaining
- Cut yarn, leaving about 30cm tail. Draw yarn through remaining stitches, fasten, weave in ends, and attach your pom-pom
And here you have it – one perfectly formed bicycle hat! You can add a bobble at the end if that’s your vibe, or leave as is.
Happy knitting, and as always, please send me your photos of anything you’ve tried – you can also find me on Instagram as @craftitlikekatie
I’m in a women’s cycling club and I made this hat for our white elephant gift exchange; everyone LOVED it, thanks so much for sharing the pattern.
LikeLike